Step 4: Create the Menus
The Menus provide access to the maps from the Home button. How the menus will appear will depend upon the theme used.
In this tutorial, we will use a standard theme.

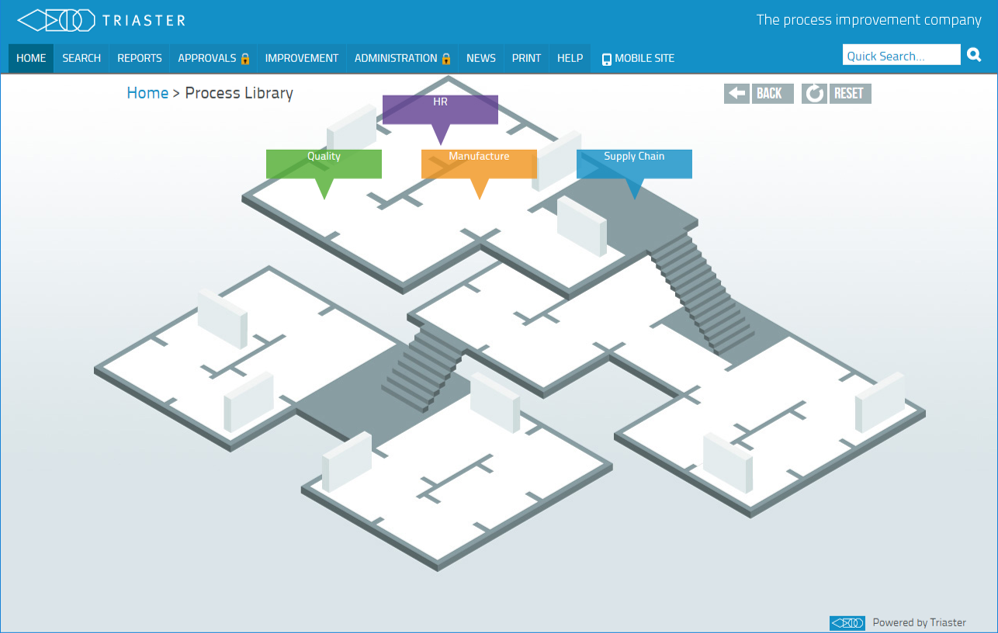
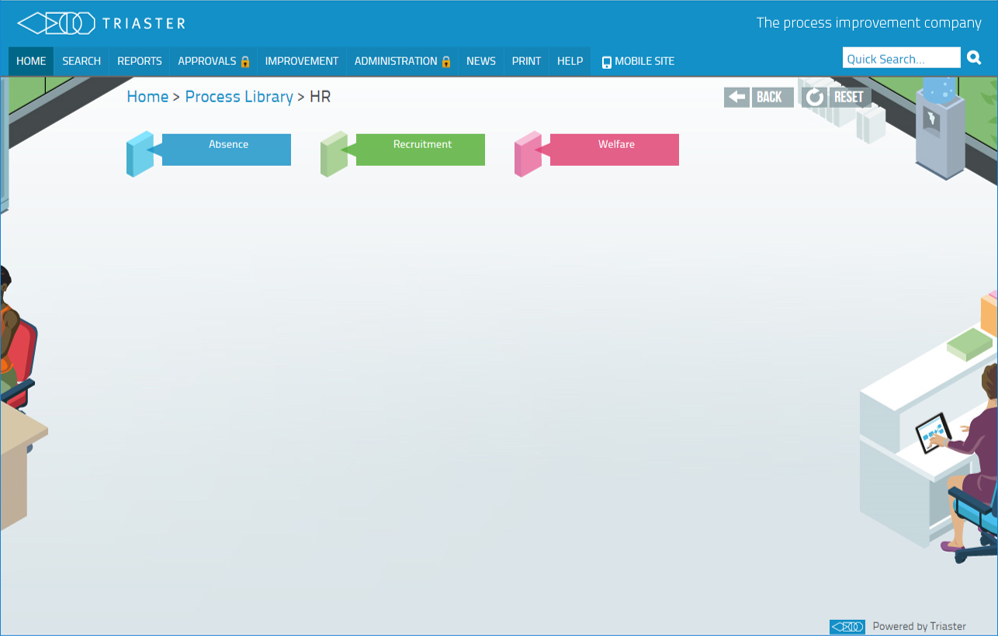
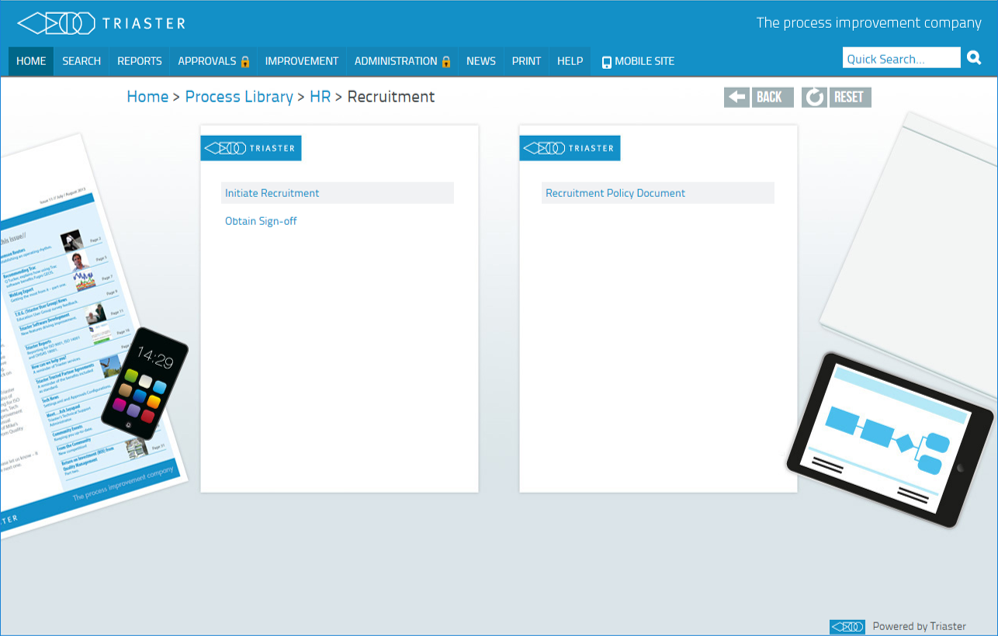
These show the Home page and menu pages for a menu hierarchy.
Clicking Process Library on the Home Page will open the second page (Departments); clicking a button on the Departments page will open the third page (Services for the Department); clicking a button on the Services page will open the fourth page (maps and documents for that service).
We can create this links between these pages using the Menu Editor.
- On the Administration page, click on Menu Editor in Library Management in the column on the left. A new tab in the browser will be created and the Menu Editor Page will appear.
- Click on the + next to Process Library to open the hierarchy - Process Library on the Home page, Quality, Manufacture and Supply Chain on the second level.
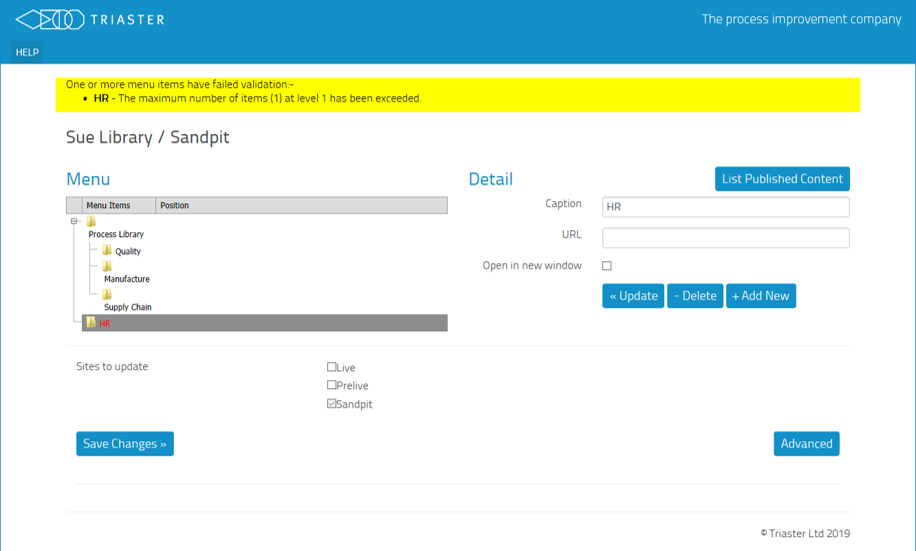
- In the Caption box, type HR and click + Add New. HR will appear at the bottom of the list.
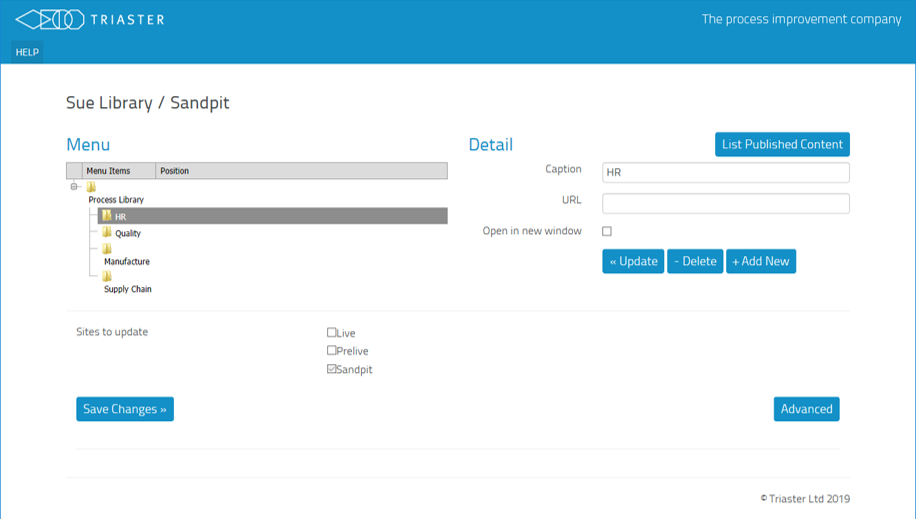
- Drag HR and drop it onto Quality. In the box that appears, select Above and HR will appear above Quality.
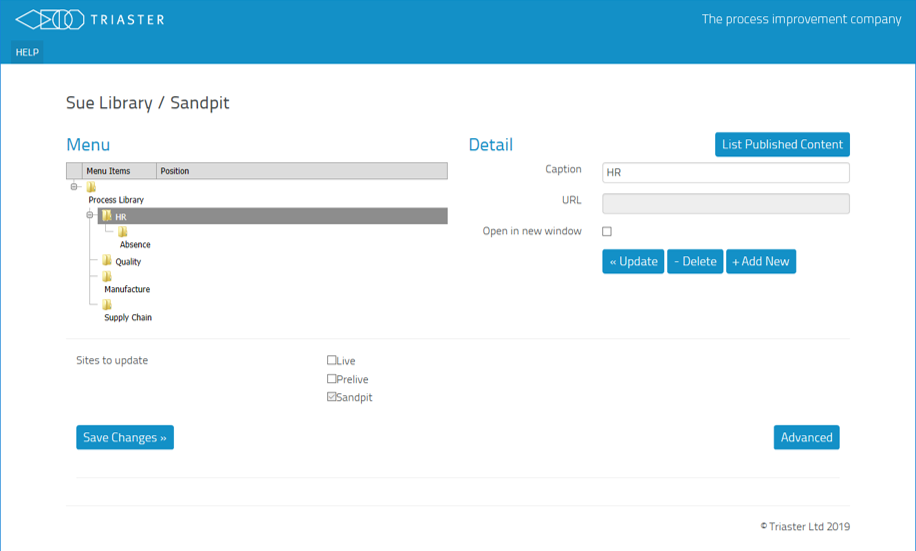
- To add a Service for HR, type Absence in the Caption box and click + Add New. Drag it from the bottom of the list and drop it onto HR. Select Inside in the box that appears. Click on the + next to HR to open its new hierarchy.
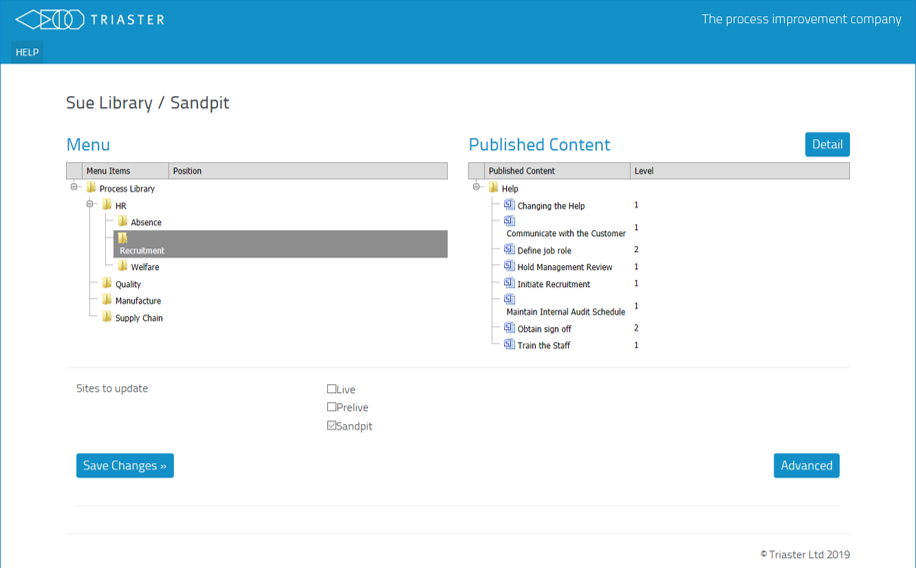
- Add Welfare and Recruitment as Services of HR, by adding them, dropping them onto Absence and selecting Below.
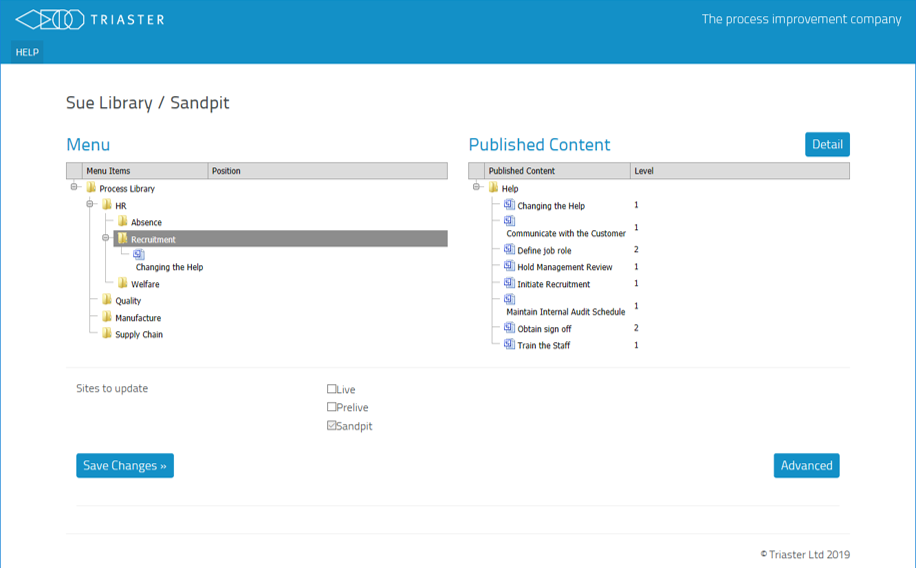
- To add a map to the Recruitment Service, click on List Published Content above the Caption box. The list of published maps will appear
- Drag any map to the menu hierarchy and drop it on Recruitment and select Inside from the box that appears. Click on the + next to Recruitment to open the hierarchy.
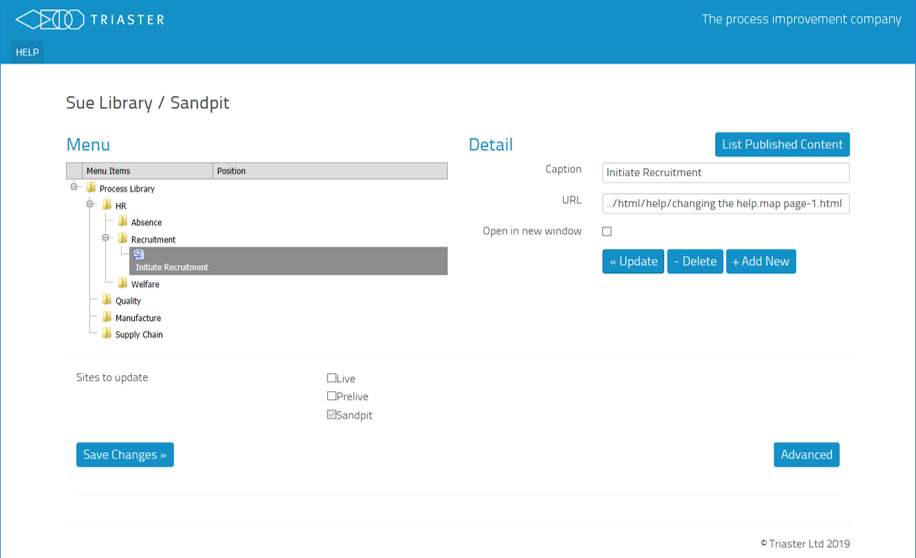
- When you have added any maps you wish, click on Details next to Published Content to return to the Caption box. Click on the map added and the Caption box shows the name of the map and in the URL box its location.
- You can use the Caption box to change the title of the maps you have added. With the map selected, replace the text in the Caption box with Initiate Recruitment and click << Update.
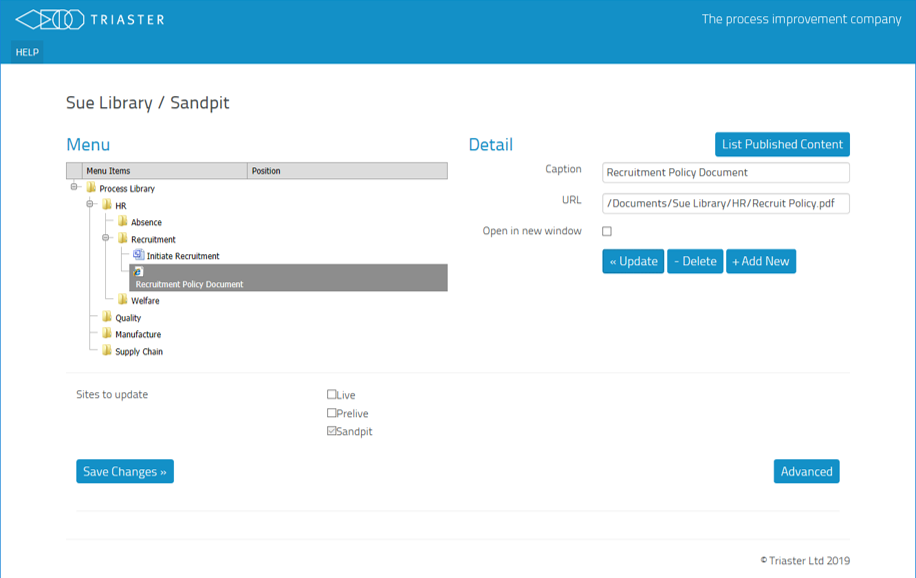
- To add a document to the menus, type Recruitment Policy Document into the Caption box. In the URL box, type in the path and filename of the document. Click on + Add New and drag and drop it on Initiate Recruitment and select Below.
- Click Save Changes to save the changes. The timestamp of the Save will appear below the button. Close the tab and return to the Administrator Menu page.
- Click on the Home tab and review the menu you have created.
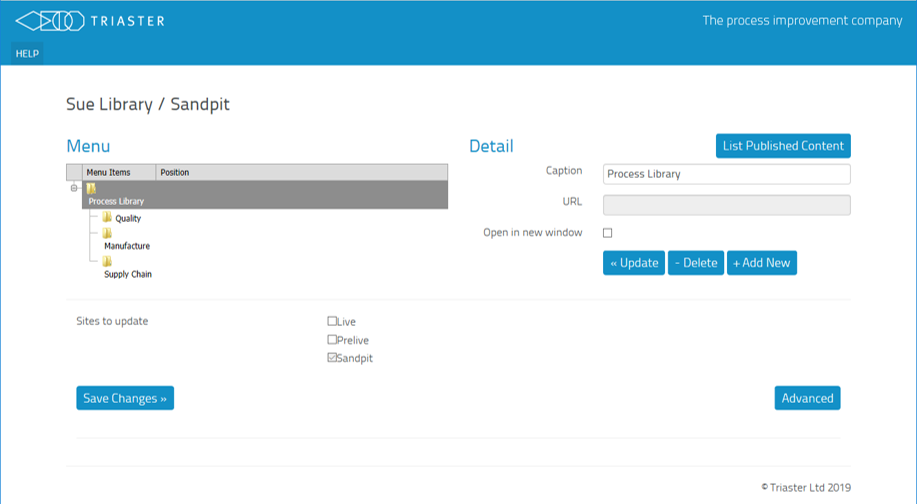
NOTE: The warning in yellow that appears at the top is because in this theme there is only one Menu Item permitted on the Home page. This may not be applicable for your theme.
NOTE: The URL of the map has not changed, just the title that will appear on the menu.
NOTE:The path to the document will depend on where it is stored relative to the Process Library. For documents within the Process Library the path will usually begin /Documents/. Documents stored on a Company Server will usually have the full path name including the server name. For documents on the internet, the full URL will be required.
NOTE: If you close the tab without Saving, you will be shown a window that tells you that you will lose any changes you have made and offers Leave or Stay buttons.